Going to the Cabaret!


So, I have finally finished the base of my new steampunk attire. There are no fancy dohickeys and thing-a-ma-bobs yet, nor is the set finished. I still need to find a way to secure the skirt, and put the flap behind the corset. However, here is whats done...


Rough edges..


Butterick 4790


Butterick 4790

Figure: B (Contrast) Size 8
Material: Old Ikea sheet for the black, and an "unkown" cotton type fabric from Walmart's left over fabric bin for the patterned fabric.
Modifications: I am short, so I took out 8 inches from the skirt and 2 inches from the upper area. (Since the front piece is one whole piece, I took 2 inches from the " shorten or lengthen here" line and went about mid way down and took the 8 inches. I also lowered the neckline to a point, and put in eyelets instead of buttons in the front.
Notes: I don't recommend snaps for the back,they come undone very easily. I used a hook and eye instead. The bodice area is rather wide, could definitely use some narrowing if you are small. Very very easy dress, would love to make it again.


Mccalls 6331 Jumper


Mccalls 6331

Figure: Hybird between A bottom and C top
Material: Polka dot Calico for the top and Black Broadcloth for the shorts.
Modifications: I took out about 2 inches on the bodice to accommodate my height, and I added a belt.
Notes: I hated the breast area. The instructions were very unclear and it didn't match up like it was supposed to. I would like to make this again, but a little differently for the top.

Butterick 5214


Butterick 5214
Figure: A and B
Size: 8
Material: Dress is calico, Jacket is cotton.
Modifications: 2" taken out of bodice, but not jacket. 4" from skirt. I took the zipper to the edge instead of adding a hook. I also tightened the neckband. I needed it shortened, so I just made a hole next to the first one and tucked the first under. 
Notes: I should have moved the darts in the bodice side. They seem a little low for me.


Vogue 2961


V2961


VOGUE 2961 
Size: 8/10
Material: Very Light Polka-dot cotton.
Notes: I should have taken more length out of the bodice for my petite-ness.


Reversible Handbag


Matching Dress


The Handbag
I made this as an easy alternative to buying a matching purse for each dress. I'm simply not that high maintenance. But I also don't want to put work into dresses, then make it look funny with an odd handbag.


  1. 1

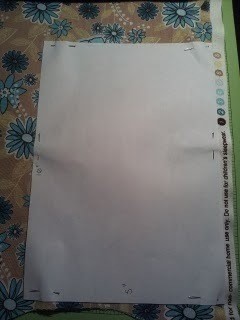
    Step 1Step 1: Figure out the size you want the final bag to be. (I found 6 by 9 inches to be perfect hand size) 
    Add an inch to each. (So 7"x10" for mine)
  2. Step 22
    Step 2:
    Cut the excess from the paper.
  3. Step 33
    Step 3:
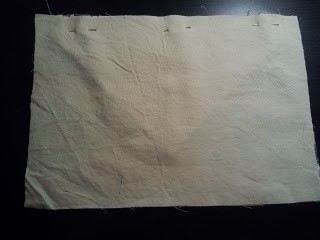
    Pin and cut 2 pieces from each material.
  4. Step 44
    Step 4:
    Measure an inch from the long edge and mark on each side. Measure to the center of the other long edge, then an inch in, and mark. Draw the lines as shown
  5. Step 55
    Step 5:
    Cut paper
  6. Step 66
    Step 6:
    Pin and cut 1 from each fabric
  7. Step 77
    You should have these
    2 of each rectangle
    1 of each triangle
  8. Step 88
    Step 7:
    Put Wrong sides together. Stitch 1/4" seam all the way around.
  9. Step 99
    Clip Tip. Turn right side out and Press.
  10. Step 1010
    Step 8:
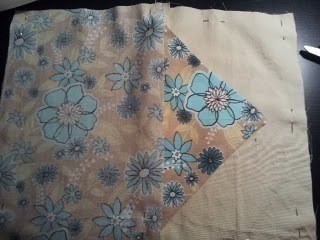
    Put matching flap side on right side of matching fabric.
  11. Step 1111
    Step 9:
    Lay Opposite fabric right side down on top matching edges. Pin top edge.
  12. Step 1212
    Step 10:
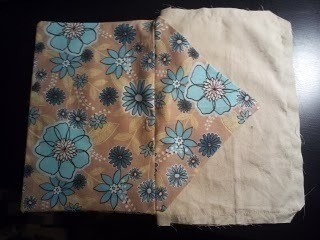
    This was the tricky part.
    Lay the bag wrong sides down. Flap up.
    Lay the remaining fabrics right side down on matching sides. So for mine. Flowers on flowers, tan on tan. Pin all 3 sides, except flap edge for both sides.
  13. Step 1313
    Step 11:
    Sew all 3 edges with 1/4" seam, make sure not to catch any of the other fabric or seams.
  14. Step 1414
    Step 12:
    Clip corners, make sure not to clip seams.
  15. Step 1515
    Step 13:
    Turn fabric A side right side out.
  16. Step 1616
    Step 14:
    Turn fabric B into Fabric A. There will be 2 raw edges.
  17. Step 1717
    Step 15:
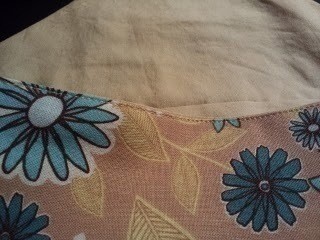
    Fold in 1/4" of fabric on each raw edge, pin and sew them together close to the edge.
  18. Step 1818
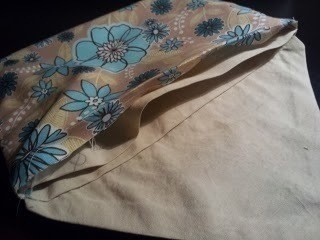
    Like So.
  19. Step 1919
    It should look like this....
  20. Step 2020
    ....and this when turned inside out.
  21. Step 2121
    Final steps:
    add a button hole and a button on each side. TADA